When it comes to cycling performance and safety, the little details matter. One often-overlooked aspect is the torque measurement of carbon seatposts. Getting this right is essential for a comfortable and secure ride. In this comprehensive guide, we’ll delve into the intricacies of measuring carbon seatpost torque, ensuring your cycling experience is both efficient and safe.
Understanding Carbon Seatposts
Carbon seatposts are prized for their lightweight and shock-absorbing properties. However, they require precise torque settings to prevent over-tightening or under-tightening. Achieving the optimal balance is crucial to avoid damaging the carbon fiber and to prevent seat slippage during rides.
Importance of Accurate Torque
Balancing torque is critical; excessive tightening can lead to cracks in the carbon material, while insufficient torque can result in seatpost slippage. This underscores the significance of understanding and applying the right torque measurements.
Step-by-Step Guide to Measuring Carbon Seatpost Torque
Follow this step-by-step guide to ensure you measure your carbon seatpost torque accurately:
1. Gather the Necessary Tools
Before you start, make sure you have the following tools ready:
- Torque wrench;
- Carbon assembly paste;
- Bike stand or repair stand.
2. Refer to Manufacturer’s Guidelines
Every bike and seatpost manufacturer provides specific torque recommendations. Locate this information in the bike’s manual or on the manufacturer’s website.
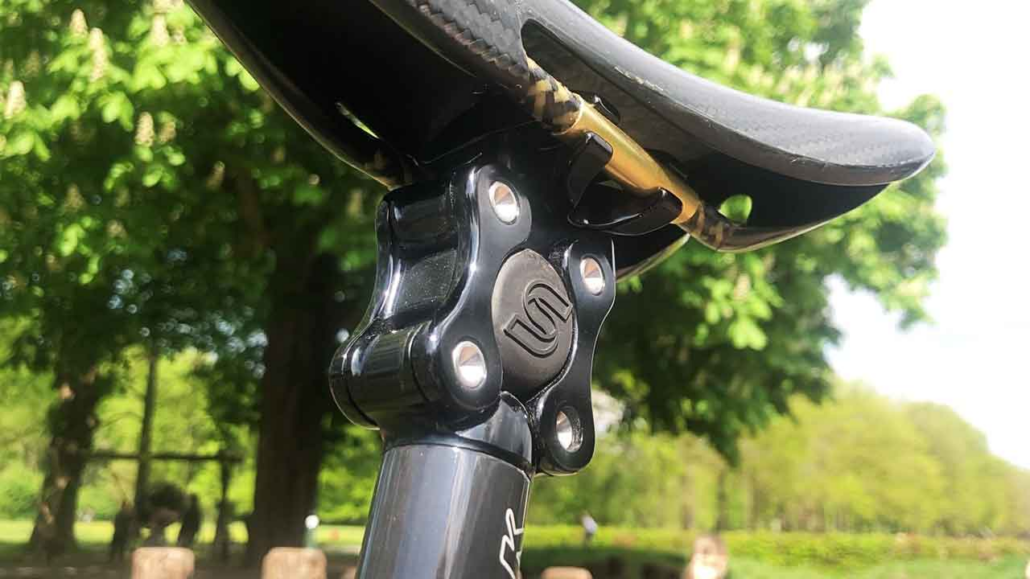
3. Prepare the Seatpost
Clean the seat tube and seatpost thoroughly. Apply a thin layer of carbon assembly paste to the areas that will come in contact with each other.
4. Insert the Seatpost
Insert the seatpost into the seat tube, ensuring it’s aligned correctly. Leave a bit of the seatpost exposed for adjustments.
5. Set the Torque Wrench
Attach the torque wrench to the appropriate bolt and set it to the recommended torque value. Most carbon seatposts require a torque of 5-7 Nm.
6. Apply Torque
With the torque wrench in place, apply gradual pressure until you hear a distinct click. This indicates that the desired torque has been reached.
7. Double-Check
Wait for a few seconds and repeat the torque application to ensure consistency.
Recommended Torque Values
| Bike Component | Torque (Nm) |
|---|---|
| Carbon Seatpost | 5-7 |
| Handlebar Clamp | 5-8 |
| Stem Bolts | 5-7 |
| Saddle Clamp | 4-6 |
Exploring Different Types of Torque Wrenches
Choosing the right torque wrench for measuring carbon seatpost torque is essential. Various types are available, each with its own advantages. Here’s an overview of some common torque wrench options:
Click-Type Torque Wrenches
Click-type torque wrenches are widely used and provide an audible “click” when the desired torque is reached. They are straightforward to use and offer reliable results. Remember to release tension after each use to maintain accuracy.
Beam-Type Torque Wrenches
Beam-type torque wrenches have a visual indicator, often in the form of a moving beam, that shows the applied torque. They are simple and durable, making them suitable for home mechanics.
Digital Torque Wrenches
Digital torque wrenches provide a digital readout of the applied torque. They are precise and user-friendly, often allowing you to switch between different units of measurement.
Dial Torque Wrenches
Dial torque wrenches have a dial gauge that displays the applied torque. They are commonly used in industrial settings due to their accuracy and robustness.
Troubleshooting Seatpost Issues
Even with proper torque measurement, issues may still arise. Here’s how to troubleshoot common seatpost problems:
Seatpost Slippage
If your seatpost slips despite correct torque application, first ensure you’re using the recommended torque value. If the problem persists, clean the seatpost and seat tube, then apply fresh carbon assembly paste.
Creaking Noises
Creaking sounds from your seatpost can be unsettling. Try removing the seatpost, cleaning it thoroughly, and reapplying carbon assembly paste. Check for any loose components in the saddle area as well.
Torque Loss
If you notice that the torque on your seatpost decreases over time, consider using a torque sealant to secure the adjustment bolts. Regularly check and retighten bolts to prevent this issue.
The Role of Material Composition
Carbon seatposts are known for their specific torque requirements due to the unique properties of carbon fiber. However, some seatposts are made from different materials, such as aluminum or steel. The material composition can impact torque settings:
- Carbon Fiber Seatposts: Due to carbon fiber’s delicate nature, torque settings must be precise to prevent damage. Follow the manufacturer’s recommendations closely;
- Aluminum Seatposts: Aluminum is generally more forgiving than carbon fiber. Still, consult the manufacturer’s guidelines to ensure you’re applying the correct torque;
- Steel Seatposts: Steel seatposts often have higher torque tolerances. While they’re less likely to be damaged by excessive torque, it’s still important to avoid over-tightening.
Maintaining Torque Consistency
Ensuring torque consistency is crucial for your safety and the longevity of your bike components. Here are some tips to maintain accurate torque measurements over time:
- Regular Checks: Make torque checks part of your routine maintenance. Regular inspections help catch any changes before they lead to issues;
- Use Torque Labels: Apply torque labels or paint marks to bolts after tightening. This makes it easier to spot any changes during subsequent inspections;
- Keep Tools Clean: Keep your torque wrench clean and well-maintained. Regularly calibrate it according to the manufacturer’s instructions;
- Follow Changing Guidelines: As your bike or components age, the manufacturer’s torque guidelines may change. Stay up-to-date to ensure your bike’s safety.
Conclusion
Measuring carbon seatpost torque is a critical aspect of maintaining your bike’s performance and safety. By following the steps outlined in this guide and adhering to manufacturer recommendations, you’ll find the perfect balance between tightness and security, ensuring an optimal cycling experience.
FAQs
Over-tightening can lead to cracks in the carbon material, compromising the seatpost’s integrity.
Yes, carbon assembly paste prevents over-tightening and helps maintain a secure grip without excessive force.
It’s best to use a torque wrench specifically designed for bicycle components to ensure accurate measurements.
Check torque before and after long rides, as well as during routine maintenance intervals.
Yes, you can reuse it, but be sure to clean and reapply it when removing or adjusting the seatpost.