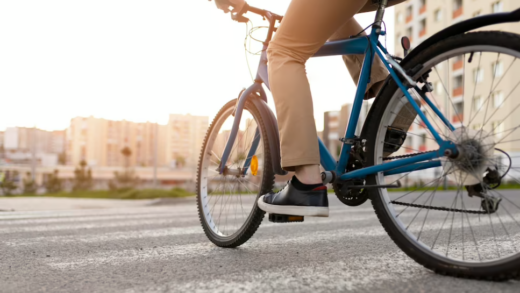
In the world of cycling, mastering the art of inflating Presta valves (PVs) without the use of an adapter is a skill every cyclist should possess. PVs offer advantages such as the ability to handle higher pressures and a slimmer profile, but their construction can sometimes pose challenges during inflation.
Fear not, for within this technical guide, you’ll find a step-by-step process for successfully inflating PVs without the use of an adapter.
What Is a Presta Valve?
The PV, also known as the French valve, is commonly used in bicycle inner tubes and some high-performance bicycle tires.
It was developed in France and stands out with its slim and elongated shape compared to other types.
It’s recommended for use in high-pressure conditions, making them suitable for road and racing bicycles.
Key Features:
- Slim Construction: PVs are significantly slimmer than Schrader valves (SVs). This design allows for smaller rim holes while maintaining wheel integrity;
- Sealing Mechanism: They feature a locking nut at the top that can be tightened to secure the valve to the rim. This helps prevent air leakage during inflation and while riding;
- Lack of Spring Mechanism: Unlike SVs, they lack a spring mechanism. Instead, manual pressure is used to open and close the valve;
- High-Pressure Resilience: Well-suited for use at high pressures, such as in road cycling, where maintaining precise tire pressure is crucial for optimal performance and efficiency;
- Common in Racing and Lightweight Bicycles: They are often found on road, racing, and competitive bicycles due to their lightweight design and ability to handle high pressures.
Inflation typically requires a pump with a specialized head or a cartridge compatible with PVs. Additionally, they come equipped with a cap that protects the valve, preventing dirt and debris from interfering with its function.
It’s important to note that PVs may be somewhat more delicate compared to SVs, so caution should be exercised when inflating and adjusting them. Proper maintenance and inflation of bicycle tires with PVs can contribute to improved ride quality and extended equipment lifespan.
Presta Valves vs. Schrader Valves
| Aspect | PV | SV |
|---|---|---|
| Type | Skinny, with a threaded core | Short, with a spring-loaded core |
| Diameter | Narrow | Wider |
| Stem Material | Typically aluminum or lightweight alloy | Brass or nickel-plated brass |
| Cap | Often comes with a removable cap | Typically has a built-in cap |
| Inflation Mechanism | Requires unscrewing the cap | Directly compatible with most pumps |
| Locking Nut | Usually requires a locking nut for inflation | No locking nut needed |
| Pressure Retention | Generally better pressure retention | Can lose pressure over time |
| Applications | Common in road and high-performance bikes | Common in cars and certain bike models |
| Pump Compatibility | May require an adapter for some pumps | Compatible with most pumps |
| Hole Size | Requires a smaller hole in rims | Requires a larger hole |
| Air Pressure Check | Requires a special pressure gauge (PG) | Can use a standard PG |
Remember that the designs and characteristics of valves from different manufacturers and models may vary. Therefore, when choosing for a specific application, always refer to the information about the particular product.
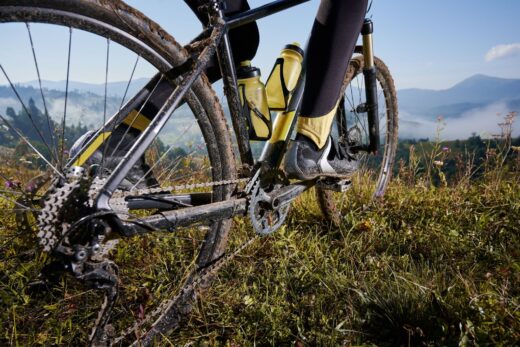
What’s the Best Way to Check Mountain Bike Tire Pressure?
Checking the tire pressure of your mountain bike is essential to ensure optimal performance, traction, and comfort during rides. Below are recommendations for checking the tire pressure of your mountain bike:
Gather all the necessary tools:
- Reliable PG: Make sure it’s suitable for the pressure range of your mountain bike tires;
- Pump: Choose a pump that is compatible with your valve type (Presta or Schrader).
Check the manufacturer’s recommendations and find the recommended tire pressure range indicated on the sidewall of your mountain bike tire. This information will give you a starting point. Use the PG:
- Unscrew the cap from the stem;
- For accurate readings, press the PG firmly onto the valve. If you’re using a PV, remember to unscrew the nut before attaching the PG;
Adjust the pressure:
- Compare the PG readings with the recommended pressure range indicated on the tire sidewall. If necessary, adjust the pressure;
- To release air, gently press the stem until you reach the desired pressure;
- To add air, attach the pump to the valve and inflate the tire. Monitor the pressure using the gauge on the pump.
After inflating or releasing air, recheck the pressure using the PG to ensure it aligns with the recommended range.
Consider riding conditions:
- Adjust tire pressure based on riding conditions;
- Lower pressure for improved traction and comfort on rough terrain;
- Higher pressure for reduced rolling resistance on smooth surfaces.
Regularly perform maintenance:
- Check tire pressure before every ride, as temperature fluctuations and air loss can impact it over time. Maintain tire pressure within the recommended range to ensure optimal performance and prevent damage.
Use a PG:
- For the most accurate readings, use a dedicated PG rather than relying solely on the pump’s built-in gauge.
Such gauges are generally more precise and reliable.
Following these recommendations will provide a safer and more enjoyable ride, while also prolonging the lifespan of your tires.
How to Inflate a PV Without an Adapter: Step-by-Step Guide
Inflating a PV without an adapter might be a bit challenging, but it’s entirely possible. Here’s a step-by-step guide to help you.
Required tools:
- Bicycle pump with a PV;
- PG (if the pump doesn’t have a built-in gauge)
Keep in mind that inflating a PV without an adapter requires some practice. If you find this difficult, you can always use an adapter or carry one with you on your trips for convenience:
- Preparation: Make sure your bike pump is compatible with PVs. Most modern pumps have dual compatibility with both PVs and SVs. Ensure that the hose and pump’s nozzle are clean and free from debris;
- Loosen the nut: At the top of the PV, there’s a threaded nut. Loosen this nut counterclockwise until it loosens, but don’t remove it entirely;
- Slightly loosen the valve core (optional): To facilitate the inflation process, you can slightly loosen the core by turning it counterclockwise. Be cautious and avoid unscrewing it completely, as that could release too much air;
- Attach the pump head: Gently slide the pump head onto the stem. Make sure it fits snugly to prevent air leakage during inflation;
- Secure the pump head: If the pump has a lever, secure it to fix the pump head onto the valve. If the pump has a screw-on nozzle, carefully tighten it until snug;
- Begin inflating the tire: If the pump has a built-in PG, monitor the pressure as you inflate. If not, use a separate PG to periodically check the pressure;
- Check and adjust the pressure: Inflate the tire to the desired pressure according to your needs and the manufacturer’s recommendations. PVs typically require higher pressure than SVs;
- To check the pressure, release the pump head and listen for the hissing sound as it’s removed from the valve. This indicates air is escaping. Quickly screw the nut back to maintain pressure;
- Tighten the nut: Once the desired pressure is reached, tighten the nut by turning it clockwise. This will securely fix the valve and prevent air from escaping;
- Remove the pump head: Release the lever or unscrew the nozzle to remove the pump head from the valve;
- Replace the cap: Put the cap back on to protect it from dirt and debris.
Following these recommendations and regularly maintaining the tire pressure of your mountain bike will ensure a safer and more enjoyable ride, while also extending the lifespan of the tires.
Conclusion
Inflating PV tires without an adapter may seem like a complex task, but with proper technique and practice, it can become straightforward. By following the step-by-step guide above, you’ll be able to confidently inflate PV tires without using an adapter.
Remember that while PVs can be a bit finicky, they come with advantages such as better pressure retention and compatibility with narrower rims often used in road and high-performance bikes.
If you frequently deal with inflating PVs and want more convenience, consider getting a dedicated pump compatible with PVs. Such pumps often come with built-in PGs, making the inflation process even more accurate and efficient.
Ultimately, whether you’re a dedicated cyclist or just an enthusiast, mastering the skill of inflating without an adapter boosts your self-confidence and ensures proper tire pressure for your bike. It’s a valuable skill that enhances your overall cycling experience and ensures you’re always ready to hit the road or trail with well-inflated tires.